Showing posts with label recipes. Show all posts

Sunday, November 27, 2011

A Delicious Childhood Memory


Sarah Wheeler’s Butterscotch Pie

(Reputed to be the First Butterscotch Pie)

This pie was mistakenly “invented” in a bakery (the Wheeler Creamerie Exchange of Connersville) in my home state of Indiana, when Sarah Wheeler, the proprietor, scorched the cream pie she was cooking while talking with a customer.  Her sons tasted the scorched results and claimed they were delicious; thus, a new pie flavor was invented! 

This is the recipe Sarah is said to have published in 1904 for a Methodist Church cookbook:

2 ½ cups milk
2 eggs separated
¼ cup flour
1 cup dark brown sugar, firmly packed
½ cup water
1/8 tsp. salt
1 ½ Tbsp. butter or margarine
1 tsp. vanilla
1 8-inch baked pastry shell

Thoroughly combine ½ cup milk, egg yolks and flour.  Set aside.  Scald remaining 2 cups of milk over hot water.  Combine brown sugar, water and salt in skillet.  Place over low heat and bring to a gentle boil.  Cook until mixture thickens and a few bubbles break sending up not whiffs, but puffs of smoke.  Add caramelized sugar very slowly, stirring constantly, to scalded milk.  When smooth, gradually stir in egg-yolk mixture and cook, stirring constantly, over hot water until thick.  Remove and add butter or margarine and vanilla.  When fat has melted, stir it in.  Cool.  Pour filling into cooled pie shell.  Make a meringue using the egg whites, ¼ tsp. Cream of tartar and ¼ cup sugar.  Spread over pie.  Bake in hot oven (400 degrees) for 8 to 10 minutes or until delicately browned. 

Wednesday, October 19, 2011

Cassandra’s Recipe for Apple Pan Dowdy

An Old Photo of a Family Peeling Apples Found by Cassandra in Indiana this Past Summer

“…apple pan dowdy makes your eyes light up and your tummy say, ‘howdy’…”


An easy, delicious recipe for using all those wonderful, fresh, ripe autumn apples: 


Preheat oven to 350 degrees. 


Peel, core and cut enough apple slices to fill a medium iron skillet.  (Cassandra loves her new cabinet-mounted apple peeler/corer – only $8.99 at Christmas Tree Shops!) 


Mix together ½ cup brown sugar, ½ cup butter, 2 tsp. cinnamon, and a sprinkle of nutmeg.  Pour mixture over apples. 


Add 2 more cups brown sugar over top and cover with ready-made crust (Cassandra's favorite is Mrs. Smith's frozen Oronoque Orchards™ Deep Dish Pie Crust).  Prick top and bake 1 hour at 350 degrees. 


Serve warm with vanilla ice cream, whipped cream or by pouring warm milk over the dowdy in a bowl.    


Enjoy while listening to Dinah Shore’s famous rendition of the song, Shoo Fly Pie and Apple Pan Dowdy, from the late 1940s! 

Thursday, July 7, 2011

Sweet Summer Strawberries

And then the fruit! the glowing fruit, how sweet the scent it breathes!
I love to see its crimson cheek rest on the bright green leaves!
Summer's own gift of luxury, in which the poor may share,
The wild-wood fruit my eager eye is seeking everywhere.
~ Mary Howett
As the much anticipated, yet short lived, strawberry season comes to a close in upstate New York, I have happy memories of picking quarts and quarts of the perfect, brilliant red berries at a pick-your-own establishment near our farmhouse and, later, enjoying my harvest with ice cream and with angel food cake.   I also happily and easily transformed 4 quarts of my harvest into strawberry freezer jam, filling 12 sparkling Ball jars.   What a joy it has been to share these little jars of concentrated happiness with family and friends!

Cassandra's Collection of Vintage Strawberry Dishtowels
I use the Ball version of the recipe since it has much less sugar (my fresh picked strawberries were sweet enough!) and does not require any cooking.
·         1 package Ball No Cook Freezer Jam Pectin
·         1-1/2 cups sugar
·         4 cups crushed strawberries (about 4 lbs or 2 quarts)
The finished product!

Ladle the jam into six clean 8 ounce jars leaving about a ½ inch at the top of the jar so that the jam has room to expand as it freezes.

Time to enjoy fresh strawberries!

To find locations near your home for pick-your-own fruits and veggies and for canning resources, including free printable labels, go to  PickYourOwn.org. 

Sunday, May 15, 2011

It’s Time to Welcome Hummingbirds!


Above the flower bed. Over the lawn ...
A flashing dip and it is gone.
And all it lends to the eye is this --
A sunbeam giving the air a kiss.
From: “The Hummingbird” ~ Harry Kemp

Today I spied the first Ruby-throated Hummingbird of 2011 at my feeder.  About a month ago, I had placed a red flowering plant in a hanging pot near my feeder and had filled the feeder with my homemade nectar (see below).

The migratory Ruby-throated Hummingbird breeds in continental North America east of the Mississippi River and Great Lakes. They first start to appear at my home near Washington, D.C. in late March. A fascinating Spring 2011 migratory map can be found at: http://www.hummingbirds.net/map.html


In the fall, most hummingbirds of the U.S. and Canada migrate south - even before the flowers and insects start to wane - to spend the winter in northern Mexico or Central America. Males generally migrate several weeks ahead of new hatchlings and females. Migration is done according to changing day length or photoperiod.

Hummingbirds are found only in the earth’s western hemisphere, so they are absent from the traditional European and African fairy tales, legends, and myths. When European settlers first saw hummingbirds they considered them a cross between an insect and a bird. They wondered how so much life could be bound up in these buzzing little bundles of extravagantly-colored feathers with their whirring wings.


Yet, there is a very rich supply of stories and myths about and decorative and ceremonial uses for these beautiful birds in Native American cultures. It has been written that the Pilgrims met American Indian ambassadors with hummingbird earrings; and soldiers and missionaries in Mexico met Aztec kings who wore cloaks made entirely of hummingbird skins. Stuffed hummingbirds were worn as lucky charms to bring success in matters of the heart.


In southern Peru, ancient artists carved out an image of a hummingbird so large that it can only be recognized at about 1,000 feet in the air. This massive image may not be far from the place where, in primordial times, the first hummingbird appeared.

In Peru and other South American countries, at or near the equator, there are, even today, an amazing 300 varieties of hummingbirds. In today’s Mexico, there is a common folk belief that hummingbirds bring love and romance, and dead hummingbirds are sold as amulets.


To attract these tiny avian jewels, you can place a red table cloth or towel in your yard or garden a few weeks before migration is expected. Those who have a red car or truck in the driveway are especially able to attract hummers! My next project is to add some plants to my garden which attract hummingbirds – a list of these can be found at: http://www.hummingbirds.net/attract.html

Preparing your own nectar is preferable to purchasing the expensive and less nutritious nectars sold commercially.

Cassandra’s Hummingbird Nectar Recipe

Add ¼ cup white granulated sugar to 1 cup boiling (to deter growth of bacteria in nectar) water
Cool and fill your red hummingbird feeder.
Any extra nectar can be stored in the refrigerator for up to 3 days.

Note: Never use honey, artificial sweeteners, or red food coloring as these are harmful to hummingbirds.
To prevent mold, your feeder must be cleaned and nectar changed every 3-4 days -- more often in hot weather.


Within My Garden, Rides a Bird
by Emily Dickinson
Within my Garden, rides a Bird
Upon a single Wheel --
Whose spokes a dizzy Music make
As 'twere a travelling Mill --

He never stops, but slackens
Above the Ripest Rose --
Partakes without alighting
And praises as he goes,

Till every spice is tasted --
And then his Fairy Gig
Reels in remoter atmospheres --
And I rejoin my Dog,

And He and I, perplex us,
If positive, 'twere we --
Or bore the Garden in the Brain
This Curiosity --

But He, the best Logician,
Refers my clumsy eye --
To just vibrating Blossoms!
An Exquisite Reply!


To see some lovely hummingbird engravings from the 1832 book, Les Trochilidées ou les colibris et les oiseaux-mouches suivis d'un index général dans lequel sont décrites et classées méthodiquement toutes les races et espèces du genre Trochilus, Vol. II, by René Primevère Lesson, go to: http://bibliodyssey.blogspot.com/2011/05/hummingbirds.html

Friday, January 21, 2011

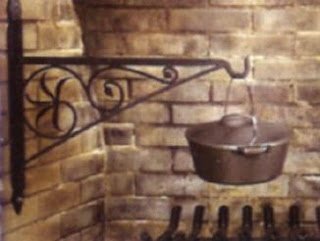
Dutch Oven Cooking


The current cold and icy winter weather beckons Cassandra to prepare some delicious dutch oven comfort food:

Braised Viennese Pork Roast with Heirloom Potatoes

Makes 6 servings.

3 lb boneless pork loin roast
1/4 c bacon drippings
1 c chopped onion
1 c chopped carrot
1 Tbsp Hungarian paprika
3/4 c chicken broth
2 Tbsp all-purpose flour
1/2 c dairy sour cream
1/4 tsp caraway seed
1 tsp chopped capers
1 Tbsp snipped fresh parsley

In Dutch oven, brown pork loin roast in bacon drippings; set aside. In remaining drippings, cook onion and carrot until tender but not brown. Stir in paprika. Lay roast atop vegetables; add chicken broth.

Bake, covered, in 350 degree F oven for 1 to 2 hours, or until meat thermometer registers 170. Remove roast to serving platter; keep warm.

Gravy: Strain pan drippings; discard vegetables. Measure pan drippings; skim off excess fat. Add water to drippings, if necessary, to measure 1 cup. Return to Dutch oven. Blend flour into sour cream; stir into liquid in pan. Cook and stir till thickened and bubbly. Stir in caraway seed, capers, and parsley. Serve with roast.

Serve roast and gravy with steamed heirloom potatoes and crusty whole grain bread & butter.

Friday, November 19, 2010

Another Delicious Autumn Squash Recipe…

I prepared this dish last evening – a delicious way to incorporate the fresh butternut squash currently available in our local markets’ produce sections.  How timely that, yesterday, a friend of mine, whose daughter is a food and travel journalist and author of a blog and two culinary guidebooks to Budapest, had gifted me with a package of Hungarian paprika!


Butternut Squash, Pine Nuts, & Blue Cheese Pappardelle

Ingredients:
1 large 2 ½ to 3 pound butternut squash
1 large sweet onion, chopped
2 Tbsp. extra virgin olive oil
1 tsp. Hungarian paprika
Sea salt
1 Tbsp. butter
¼ cup red wine
½ cup water
2/3 cup toasted pine nuts
1 pound pappardelle pasta or wide egg noodles
1 Tbsp. chopped dried sage leaves
5 to 6 oz. crumbled blue cheese

1) Peel the squash, cut in half, remove seeds and pulp and cut into 1 inch cubes

2) Using a large heavy pan (which can hold the pasta later) sauté the chopped onion in the olive oil.

3) Add paprika to the sautéd onion

4) Add butter to pan and stir in squash

5) Add red wine and water. Bring to a simmer. Cover and reduce heat – Cook for 10 minutes or until squash is tender. Remove from heat and lightly season with sea salt to taste and then with the Tablespoon of chopped sage leaves.

6) Heat water in another pan, and cook pasta according to package directions

7) Toast pine nuts in a hot, dry frying pan on the stove top, turning frequently.

8) After pasta is drained, add it to the squash mixture along with the pine nuts and blue cheese crumbles and toss together

Yield: Six 1 ½ cup servings

Thursday, October 28, 2010

An Autumn Recipe


Spaghetti Squash Gratin With Fresh Basil

Cassandra loves this recipe for spaghetti squash ~ so plentiful this time of year...

Ingredients:
1 spaghetti squash, about 3 pounds
1 tablespoon extra virgin olive oil
1 medium onion, finely chopped
2 garlic cloves, minced
Salt and freshly ground pepper
3 large eggs
1/2 cup low-fat milk
2 tablespoons chopped fresh basil (1/4 cup basil leaves)
2 ounces Gruyère cheese, grated (1/2 cup)
2 tablespoons freshly grated Parmesan or pecorino romano

1. Preheat the oven to 375 degrees. Pierce the squash in several places with a sharp knife. Cover a baking sheet with foil, and place the squash on top. Bake for one hour, turning the squash every 20 minutes until it is soft and easy to cut into with a knife. Remove from the heat, and allow the squash to cool until you can handle it. Cut in half lengthwise, and allow to cool further. Remove the seeds and discard. Scoop out the flesh, and place in a bowl. Run a fork through the flesh to separate the spaghetti-like strands, then chop coarsely. Measure out 4 cups squash. (Use whatever remains for another dish, or freeze.)

2. Oil a 2-quart gratin or baking dish. Heat the oil over medium heat in a large, heavy skillet, and add the onion.  Cook, stirring, until tender, about five minutes. Add the garlic and a generous pinch of salt. Cook, stirring, for another 30 seconds to a minute until fragrant. Add the squash. Cook, stirring often, for five minutes until the strands of squash are a little more tender. Season to taste with salt and pepper, and remove from the heat.

3. Beat the eggs in a large bowl. Add the milk, salt (about 1/2 teaspoon), pepper and basil. Stir in the squash mixture and the grated Gruyère, and combine well. Scrape into the baking dish. Sprinkle the Parmesan or pecorino over the top, and gently press down to moisten.

4. Bake 40 to 45 minutes until nicely browned and sizzling. Remove from the heat, and allow to cool for 10 to 15 minutes before serving. Serve hot, warm or room temperature.

Yield: Serves six as a main dish, eight as a side.

Advance preparation: The baked spaghetti squash will keep for four days in the refrigerator. The gratin can be made up to a day ahead and reheated. The recipe can be made through step 2 several hours before completing the gratin and baking.

Monday, October 11, 2010

Cassandra's Favorite Apple Pie

Apple pie has become part of the American consciousness as representative of all that is wholesome and good about our country; a reminder of comfort and innocence. In World War II, when American soldiers were asked by journalist why they were going to war the standard response was “for Mom and apple pie”. It has been said that the Apple Marketing Board of New York State used such slogans as "An apple a day keeps the doctor away" and "as American as apple pie!" and thus was successful in rehabilitating the apple as a popular comestible in the early twentieth century when prohibition outlawed the production of hard cider.

There are American apple pie recipes, both manuscript and printed, from as early as the eighteenth century. Yet, what we consider to be apple pie has been around in Europe since the Middle Ages. Medieval and Renaissance recipes for apple pies or tarts have shown up, in one form or another, in English, French, Italian, and German recipe collections that span centuries and which show a wide variety of ways to prepare apple pie.

English apple pie recipes go back to the time of Chaucer.  The recipe above from 1381 lists the ingredients as good apples, good spices, figs, raisins and pears.  The cofyn of the recipe is a casing of pastry.  Saffron is used for coloring the pie filling.  Cloves are a popular addition, tempering the sweetness in much the same way as cinnamon.  The absence of sugar in the recipe may indicate that, because refined sugar was a recent introduction from the Orient, the medieval English did not have as sweet a tooth as their descendants!
Cassandra's Favorite Apple Pie

Preheat oven to 375 degrees.

For Pie Crust: Cassandra likes Oronoque Orchards (by Mrs. Smith’s) frozen pie crusts

For Filling: (Makes one pie)
3 lbs apples, such as Gala, Cortland, Granny Smith or McIntosh, peeled cored and cut into half-inch wedges.
1 cup sugar
½ cup honey, preferably a local, more flavorful raw honey
½ cup cornstarch
1 tsp vanilla extract
2 tsp ground cinnamon
Zest and juice of one lemon
 
Thaw the frozen pie shells.
In a large saucepan, sift together the sugar and cornstarch, then toss with apples, honey, vanilla, cinnamon, lemon juice and zest. Let stand for 20 minutes.
Bring fruit mixture to a boil over medium heat, stirring constantly until the mixture has thickened slightly, making sure fruit does not stick to the bottom of saucepan. Remove from heat and cool.
Fill thawed pie shell with the fruit filling and then lay the second dough circle over the filling, press very gently around the edges and flute together. With a paring knife or cookie cutter, puncture the top pie dough to form (a) steam vent(s). If desired, sprinkle with cinnamon sugar.
Bake for about 40 minutes or until the pie filling is starting to bubble out the vents and the top pie crust is golden brown. Remove to a cooling rack and allow to cool for 1-2 hours before serving.

Friday, September 3, 2010

Hoosier Sugar Cream Pie

This pie brings back wonderful memories of childhood when my family would enjoy this sweet dessert at the old Durbin Hotel in Rushville, Indiana and at the Copper Kettle in Morristown. I love this original recipe because the pie is a tad runny rather than the consistency of a firm custard. It comes out great, whether one chooses to use 2% or whole milk or cream.


The Copper Kettle, Morristown, Indiana


The recipe has been traced back to 1816, the year Indiana became a state and has been said to have originated by early Quaker settlers. (See photo of one of my pioneer Quaker great, great, grandmothers.)

This pie was a staple after the fall harvest, when all the fruit was gone. When the settlers would run out of apples and fruit from the fall harvest, they would start making these pies from ingredients available in almost any farmhouse when winter would start and around the holidays of Thanksgiving and Christmas.

Virtually unheard of outside of Indiana, Sugar Cream Pie officially became Indiana’s State Pie in 2009.


Preheat oven to 410 degrees.

Ingredients:

1 unbaked pie crust
¼ cup white sugar
¼ cup brown sugar
1 generous tablespoon butter
2 heaping tablespoons flour
1 pinch salt
Your choice of 2% or whole milk or cream (1-1 ½ cups…enough to fill pie shell).
1 egg yolk
Sprinkle of nutmeg and/or cinnamon

Mix brown and white sugar with flour. Sprinkle flour/sugar mixture over pie crust. Beat egg yolk and butter with milk. Fill pie shell. Take a spoon and swirl it through the milk mixture a couple of times. Sprinkle top with cinnamon or nutmeg.
Bake at 410 degrees for 10 minutes. Then bake at 350 for 45 minutes. The filling should be bubbling. The center should still jiggle. Be careful not to overcook or the filling will not set.

P.S. Sadly, the Durbin Hotel closed years ago, but the Copper Kettle is still serving their famous fried chicken dinners and sugar cream pie!

Wednesday, September 1, 2010

Cassandra's Favorite Recipe for Maryland Crab Cakes


This is my favorite - moist and flavorful. Many cooks use French's yellow mustard and dry breadcrumbs, but I love the flavor of the Coleman's dry mustard and the use of day-old bread crumbles to make a truly great crab cake!

Serves 4

Ingredients:
2 slices bread, crusts removed and crumbled
2 tablespoons mayonnaise
2 teaspoons OLD BAY® Seasoning
2 teaspoons fresh chopped parsley
1 teaspoon Coleman’s Dry Mustard
2 teaspoons Worcestershire sauce
1 egg, beaten
1 pound lump crabmeat

1. Carefully remove any cartilage or shell from crabmeat.
2. In a bowl, mix bread, mayonnaise, OLD BAY, parsley, mustard, Worcestershire sauce, and egg in large bowl until well blended. Gently stir in crabmeat.
3. Shape into 4 patties.
4. Broil 10 minutes without turning or sauté both sides in a frying pan in butter or canola oil until golden brown on both sides. Sprinkle with additional OLD BAY, if desired.

Serve with Worcestershire sauce or fresh lemon wedges and white wine or beer. Enjoy!

Love this poem about crab cakes!


A Tasty Summer Memory


As summer officially draws to a close with this upcoming Labor Day weekend, I would like to share with you a quintessentially Maryland summer experience.

During the hazy heat of July, we were treated to a tasty Maryland tradition – a Chesapeake bayside luncheon “picking” crabs. Our hosts motored us on their beautiful boat, the “Bayrunner," across the Chesapeake Bay from the state capital of Annapolis on the western shore of Maryland to Rock Hall on the eastern shore – destination: Waterman’s Crab House!


The Maryland blue crab, Callinectes Sapidus , which means "beautiful swimmer," contains the sweetest and tenderest of meats. One can be lazy and order crabcakes, crab imperial, crab Norfolk-style or even soft shells, but a true Marylander must order at least a half bushel – preferably jumbos or extra larges - and surround a brown paper- or newspaper-covered table for the L-O-N-G time it takes to sit with friends and/or family and some pitchers of cold beer to pick the crabs clean of their sweet goodness. You get dirty as you eat, so plenty of paper towels are at hand!


Before the crabs are brought to the table, they must be steamed gently with rock salt and some beer and seasoned liberally with Old Bay Seasoning – a combination of celery salt, mustard, pepper, laurel leaves, cloves, pimento, ginger, mace, cardamom, cassia, and paprika – manufactured by the Baltimore Spice Company.


The only tools necessary for removing the meat from the shells are a wooden mallet and your fingers! You will also need a bucket in which to discard the shells and other inedible parts.


Here’s how we pick crabs in 7 easy steps:
1) Pick out a crab – grab one with both claws!
2) Bend or twist the legs and claws to snap them off at the body. Set the claws aside. There is not much meat (if any) in the legs so put them in the shell bucket.
3) Pull off the "apron" with a knife or with your fingers - simply slip your finger under the edge of the point and pull down. It should pull off easily.


4) Pry the shell away from the body using both hands and pulling the crab halves in opposite directions.
5) Flip the crab over. Remove the squishy, grey gills and discard in the bucket. The yellow stuff -colloquially known as the "mustard" - is edible.
6) Crack the crab in two. Pull out any loose crabmeat and eat it. Crack the halves and extract the meat and eat the wonderful lump meat!
7) Hold both sides of the crab claw and break apart. The claw meat should come off on the claw. If not, break the claw with your mallet. The other half of the claw has meat as well. Break it off at the joint. If this doesn't yield meat, hit it with your mallet.


Repeat this process with as many crabs as you can eat!

This short video illustrates the process well.

In Maryland, we do NOT use butter on our crabmeat – that’s for Maine’s lobsters! The sweet meat is eaten plain, or dipped in even more Old Bay, apple cider vinegar, and/or Worcestershire sauce.

THIS is what summer tastes like in Maryland!


The medieval-inspired flag of Maryland – did you know that the state sport is jousting?!

The Maryland state flower: the Black-eyed Susan…


Beatrix & Friends...

Frolicking Lambs

Cassandra Follows...